CloudM0N
Data Flow and Architecture
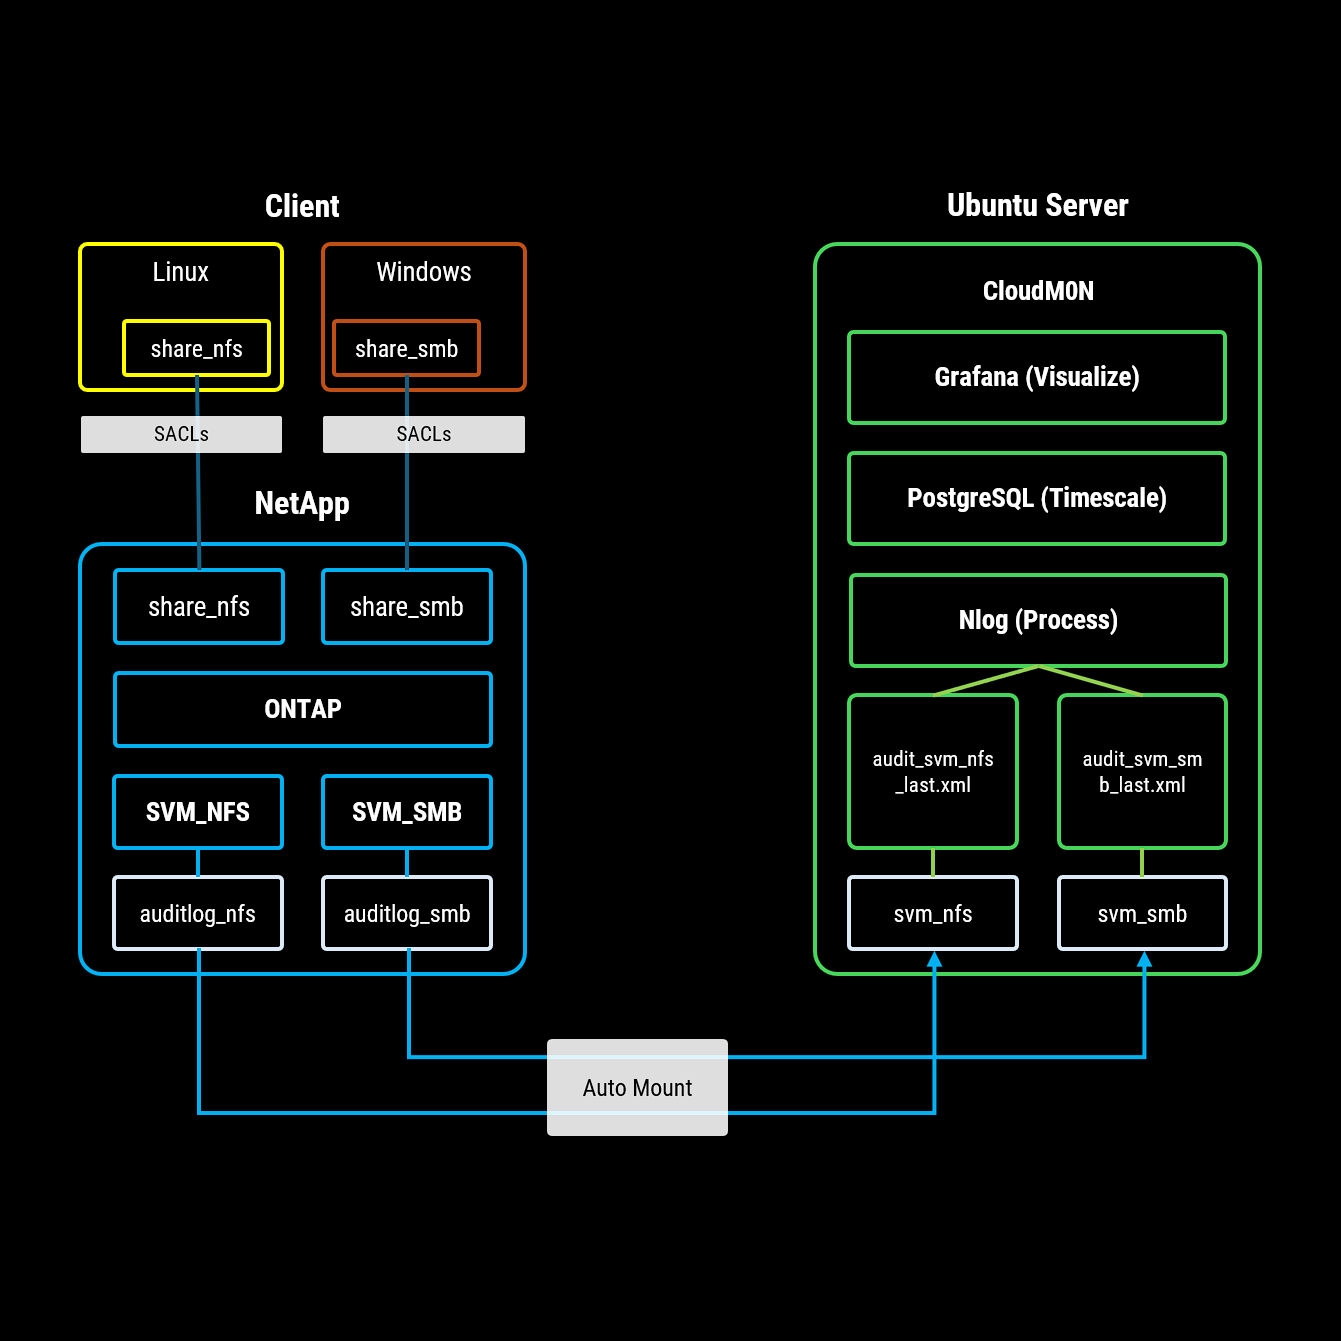
Client (Linux & Windows): End-users on Linux and Windows connect to shared volumes hosted on the NetApp storage. To enable audit logging for CloudM0N, specific System Access Control Lists (SACLs) must be configured on these shares, defining the permissions for the desired audit events to be captured and sent to CloudM0N.
NetApp: The NetApp storage system provisions shared volumes for both Linux (NFS) and Windows (SMB) clients. For audit log collection by CloudM0N, a separate volume must be created to store audit log files. These logs are generated per Storage Virtual Machine (SVM) and are stored in XML format.
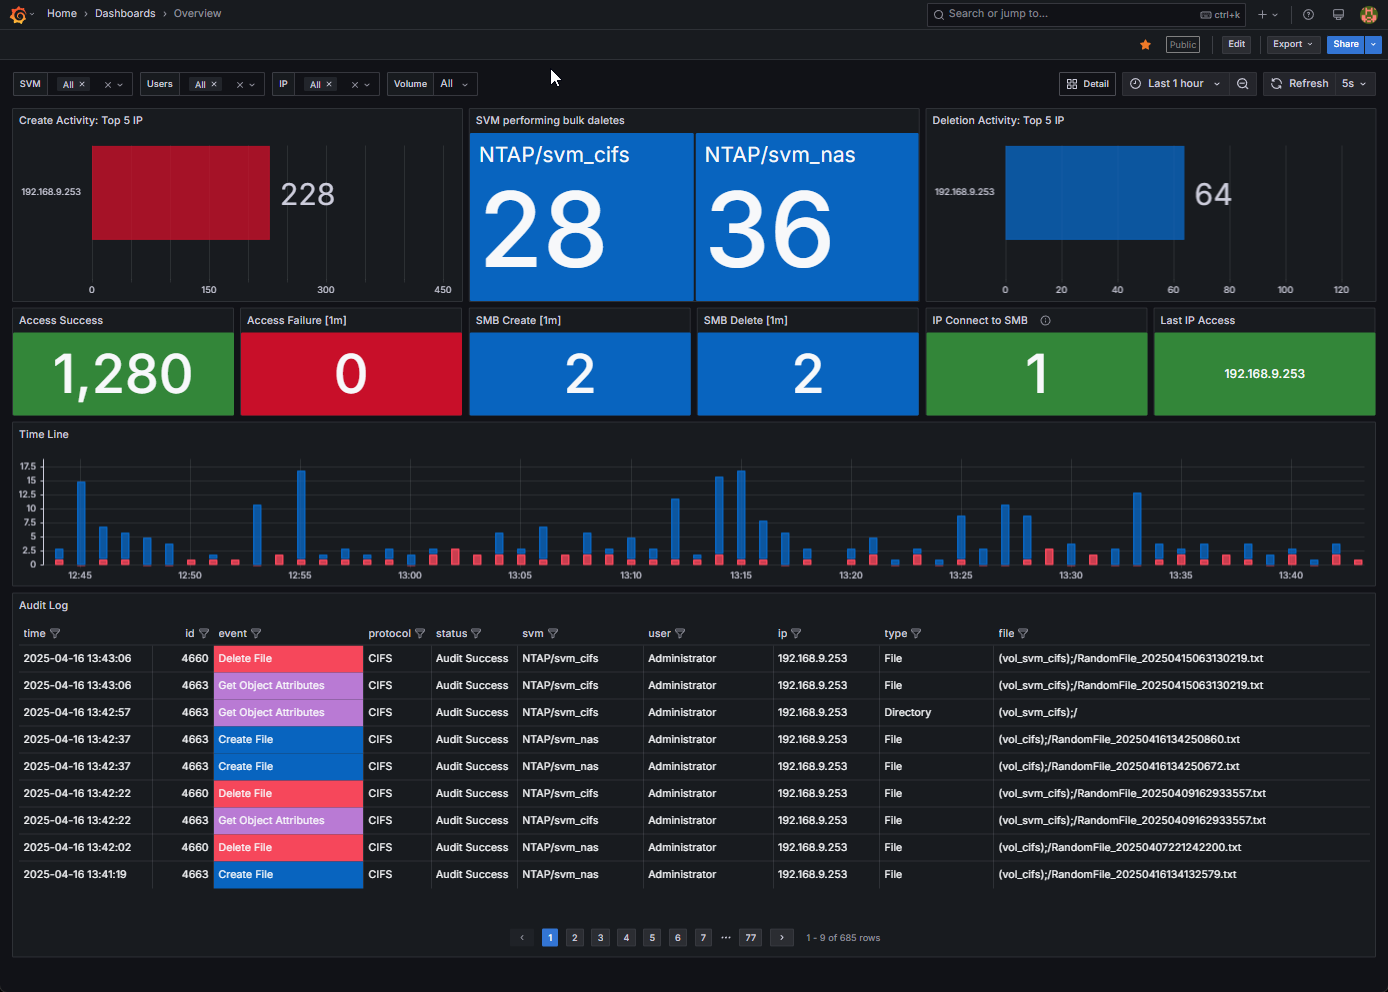
CloudM0N: This component, running on an Ubuntu Server, automatically mounts the network shares containing the NetApp audit logs. The Nlog service then processes the incoming log data, transforming and writing it into a PostgreSQL database utilizing the TimescaleDB extension for efficient time-series data management. Finally, Grafana connects to this PostgreSQL database to create and display insightful dashboards based on the audited access events..
Step 1: ONTAP
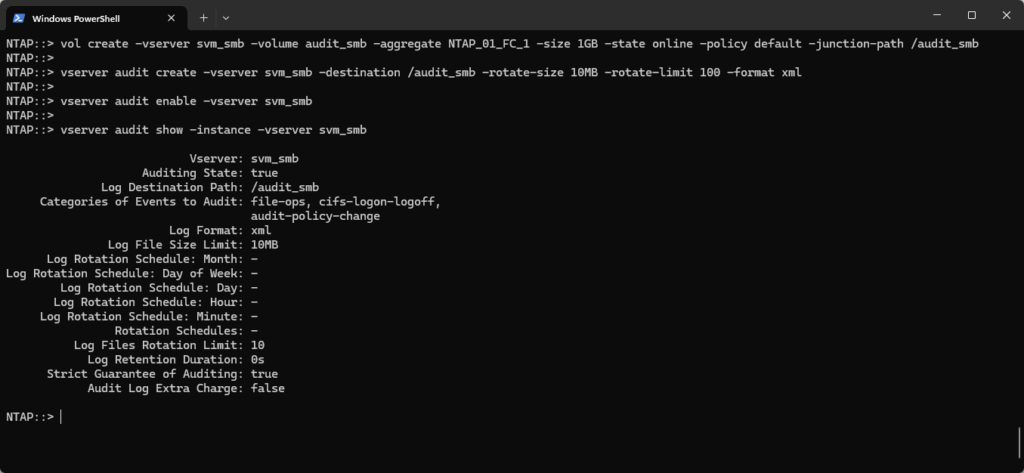
This step configuring the audit policy and enabling auditing on the specific Storage Virtual Machine (SVM).
ONTAP CLI
Copied!vol create -vserver svm_smb -volume audit_smb -aggregate NTAP_01_FC_1 -size 1GB -state online -policy default -junction-path /audit_smb vserver audit create -vserver svm_smb -destination /audit_smb -rotate-size 10MB -rotate-limit 10 -format xml vserver audit enable -vserver svm_smb vserver audit show -instance -vserver svm_smb
Notes.
- It is advisable to disable the Snapshot scheduling for the Audit Log Volume. Due to the high frequency of changes in Audit Logs, frequent snapshots can consume a significant amount of storage space.
2. Avoid setting the Audit Log file size too large ( Recommend 10-100MB). This can negatively impact the performance of ingesting Audit Log data into the database.
Step 2: Windows Server apply SACLs (System Access Control Lists)
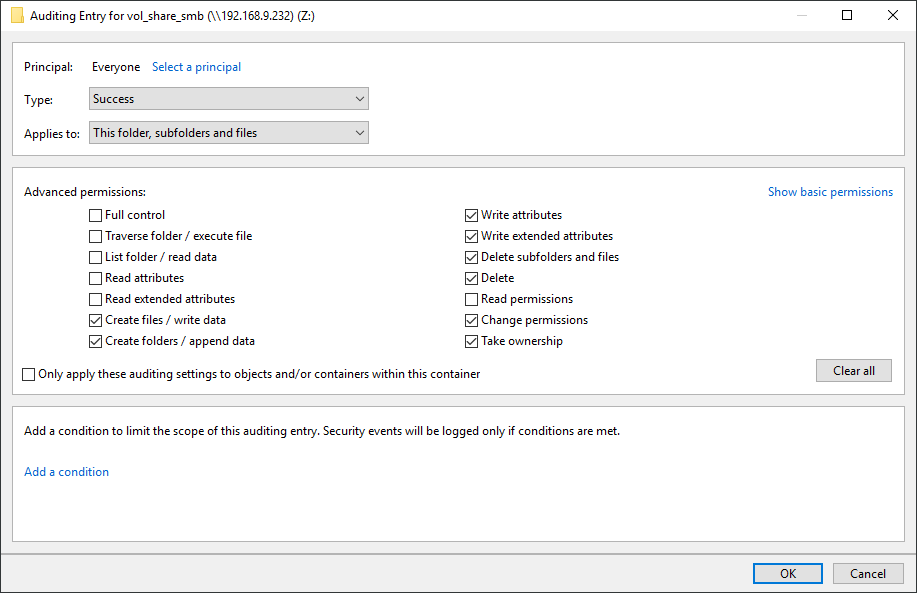
To track what users do with these shared folders, you need to tell Windows which actions (like opening, creating, or deleting files) should be sent to CloudM0N. You do this by setting up something called SACLs (System Access Control Lists) on the folders
Right click the “vol_share_smb” folder share –> “Properties” –> click the “Security” Tab
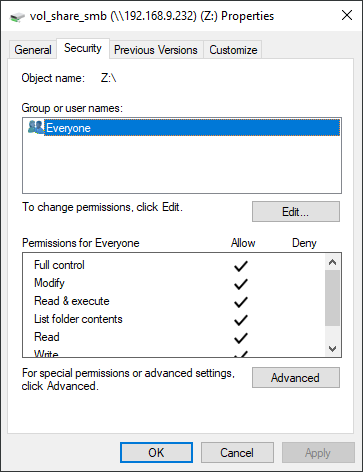
Click the “Advanced” button –> click the “Auditing” Tab -> Add

Click “Select a principal” -> Every One
Show basic permissions -> Select Audit Permissions -> OK
Guide
https://storageexorcist.wordpress.com/2020/06/03/ontap-native-nas-auditing-smb-and-nfs/
Step 3: CloudM0N
We’ve made installing all the parts of CloudM0N super simple with a special program that runs on Ubuntu (2xCPU + 4GB MEM), supporting 2 SVM. Just run this program, and it will automatically install everything you need: nLog, the database (PostgreSQL with TimescaleDB), Grafana, and even set up the automatic connection to your audit logs.
Download CloudM0N_Installer.tar

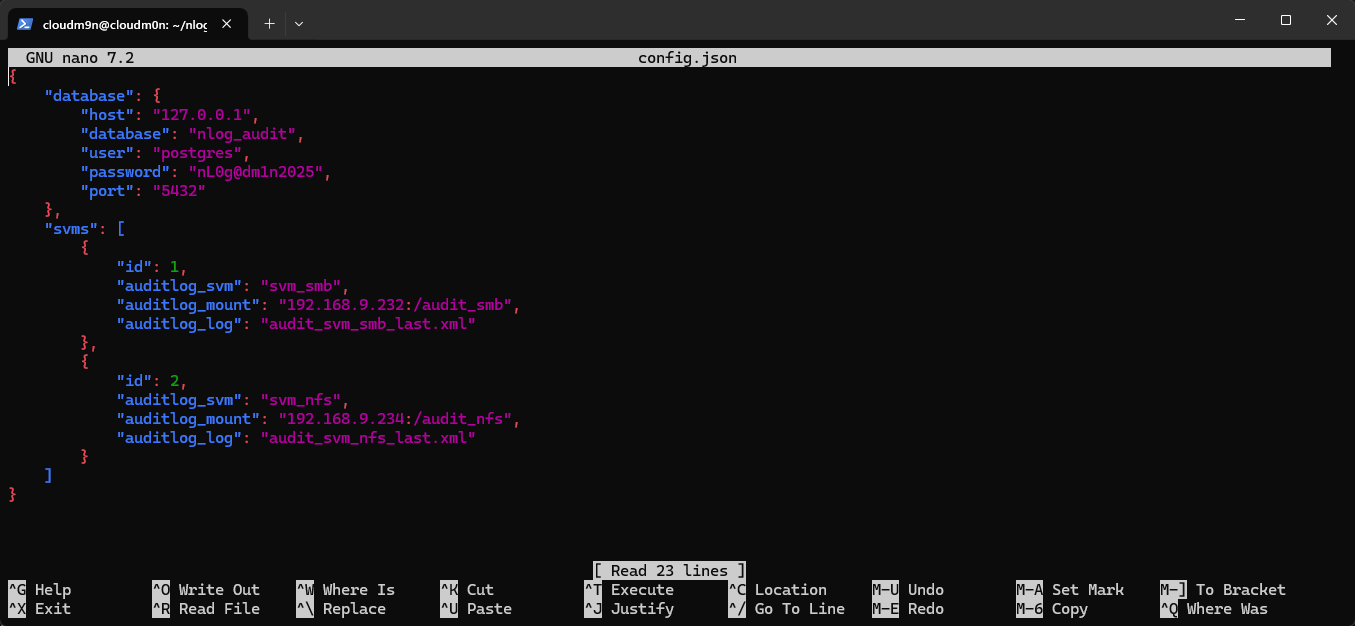
Unzip -> Edit -> config.json
Database:
- Password: (Only the password can be changed in this section.)
Storage System (SVM):
- id: (simple number that keeps track of each entry.)
- auditlog_svm: (The name of the NetApp storage system (SVM).)
- auditlog_mount: (The location (network path) where the audit logs for this SVM are stored.)
- audtilog_file: (The name of the most recent audit log file we’ve seen for this SVM.)
CloudM0N: Installation Step 1
Run nlog_install.sh
CloudM0N: Installation Step 2
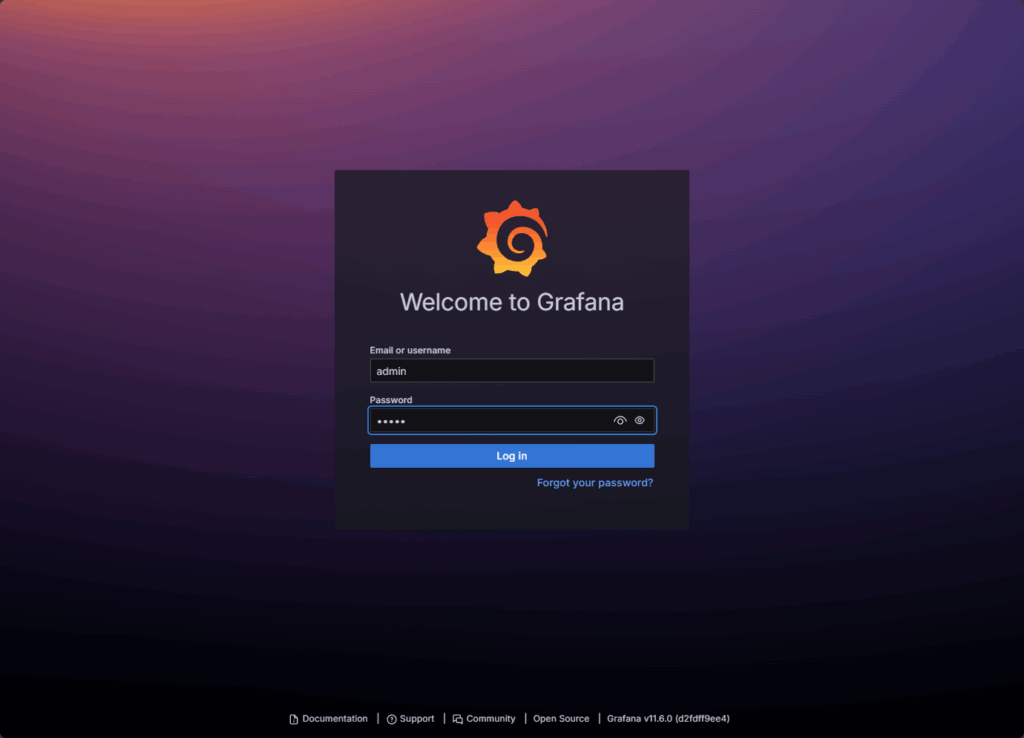
Default User: admin / Password: admin
CloudM0N: Installation Step 3
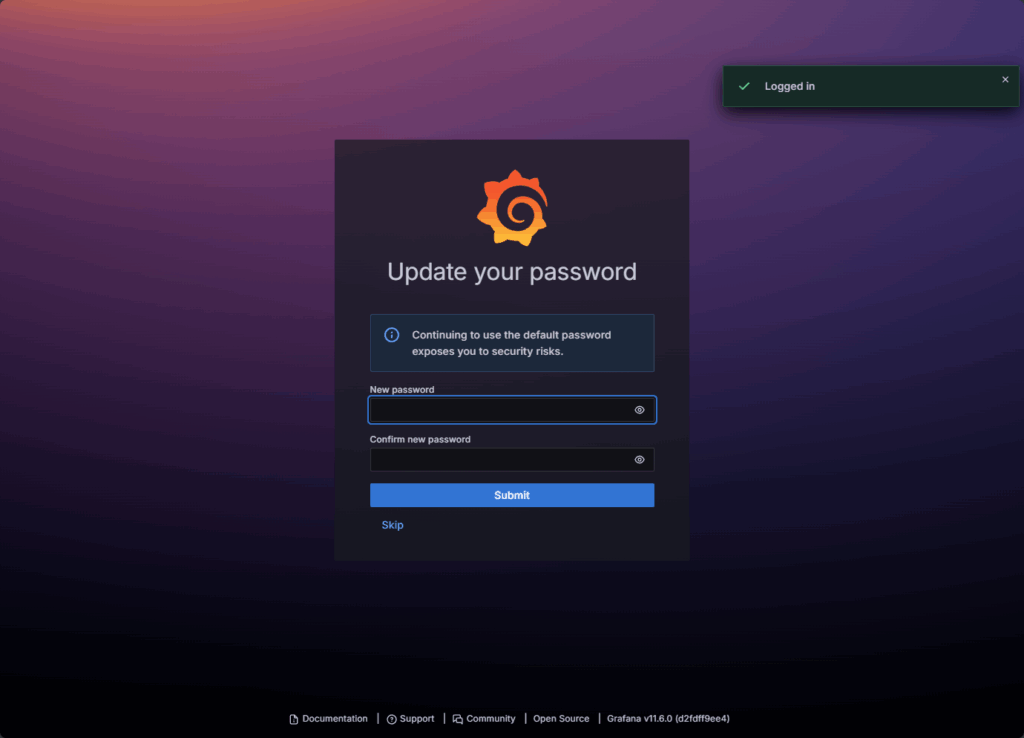
Skip password setup for now. Close your browser window to continue the installation.
CloudM0N: Installation Step 4
Press Enter to continue the setup and view the installation configuration.
Step 4: Activate License
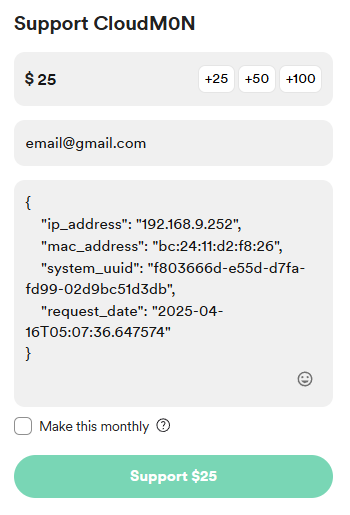
“In this step, you’ll enter your license key or follow the provided instructions to activate your software. This activation unlocks the complete functionality of CloudM0N.”
Download License File license_request.json or Copy text

Buy me a Beer (Support Development)
If you find CloudM0N useful and want to support its development, consider buying us a beer (2xDrink = $25).
Every little bit helps us keep the project going. Cheers!
Message
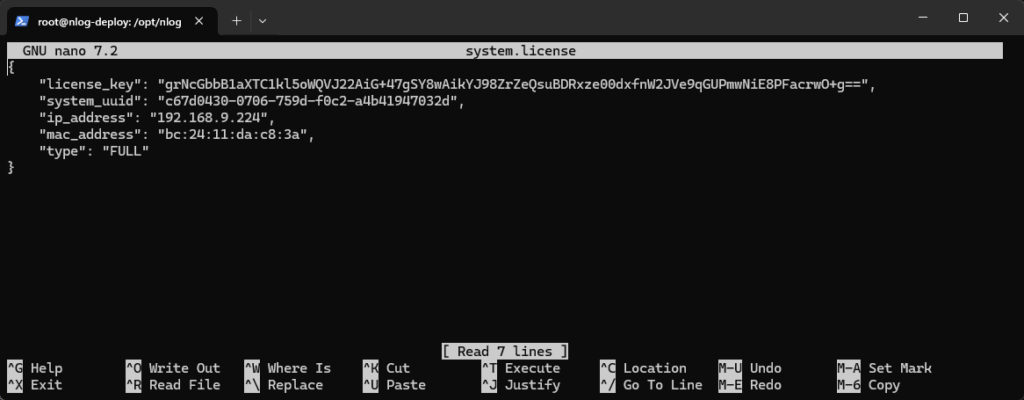
Copy File “system.license” to directory “/opt/nlog/”
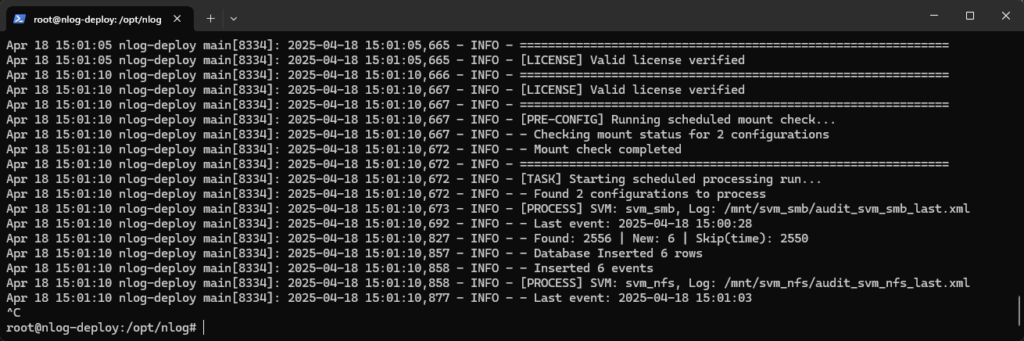
Check License verified with command: journalctl -u nlog -f
Open browser: http://<ip>:3000
Default User: admin / Password: nL0g@dm1n2025